
1. Install the VMWare tools while installing the Ubuntu 14.04 LTS
2.When the Ubuntu installation is complete the start the VM
3. Click on Player -> Manage -> Install Vmware tools
4.Run this command to create a directory to mount the CD-ROM:
sudo mkdir /mnt/cdrom
When prompted for a password, enter your Ubuntu admin user password.
5. Run this command to mount the CD-ROM:
sudo mount /dev/cdrom /mnt/cdrom or sudo mount /dev/sr0 /mnt/cdrom
You would see something like this

6. Then move to /mnt/cdrom directory and then unzip the vmware tools tar file and extract it to /tmp/ directory
tar xzvf /mnt/cdrom/VMwareTools-x.x.x-xxxx.tar.gz -C /tmp/
Note: x.x.x-xxxx is the version discovered in the previous step.
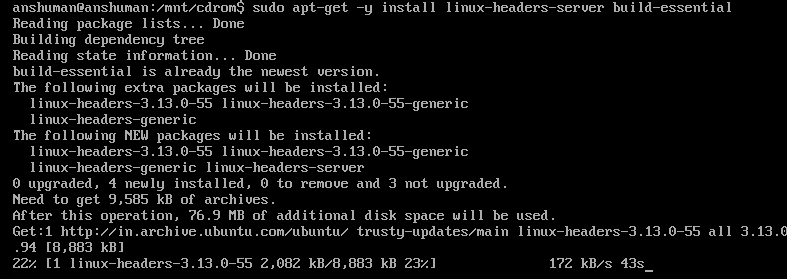
7. Install Build tools if necessary
Note These packages must be available on the Linux operating system before installing VMware Tools.
gcc
binutils
make
kernel sources
sudo apt-get -y install linux-headers-server build-essential
8. Change Directory
cd /tmp/vmware-tools-distrib
9. Unmount the ISO
sudo umount /mnt/cdrom
10. To prevent a potential error in the install script on Ubuntu 11.10+, create a special directory
Unable to create symlink “/usr/lib64/libvmcf.so” pointing to file “/usr/lib/vmware-tools/lib64/libvmcf.so/libvmcf.so”.
sudo mkdir -p /usr/lib64
11. Run the Install Script. The -d flag automatically answers the default to all questions. To customize it, just omit the -d.
sudo ./vmware-install.pl -d
12. Run sudo /usr/bin/vmware-tools-config.pl -d
