
Introduction
What is Ruby?
Ruby is a dynamic, object oriented programming language. It is a scripting language like Python
and Perl.
What is Rails?
Ruby on Rails is a web framework written in Ruby. Ruby on Rails makes it easy to built database-backend web application that uses the language Ruby.
Rails is a web application development framework written in the Ruby language. It is designed to make programming web applications easier by making assumptions about what every developer needs to get started. It allows you to write less code while accomplishing more than many other languages and frameworks.
The Rails philosophy includes several guiding principles:
- DRY – “Don’t Repeat Yourself” – suggests that writing the same code over and over again is a bad thing.
- Convention Over Configuration – means that Rails makes assumptions about what you want to do and how you’re going to do it, rather than requiring you to specify every little thing through endless configuration files.
- REST is the best pattern for web applications – organizing your application around resources and standard HTTP verbs is the fastest way to go.
Installation of Ruby
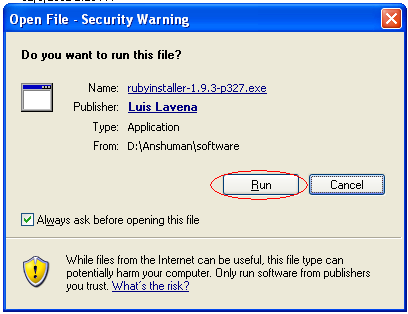
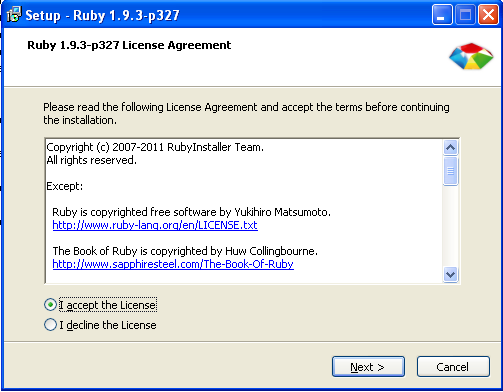
Download the latest version of the Ruby one-click Installer for Windows (rubyinstaller-1.9.3-p327.exe) .Check the repository section for any software to download. Install it by running the setup program.
After you click on next, it will ask you to enter the directory where you want to install the package. Give any name of your choice and remember the ruby directory names should not have any space in the name. Check all the check boxes and then click on Install.
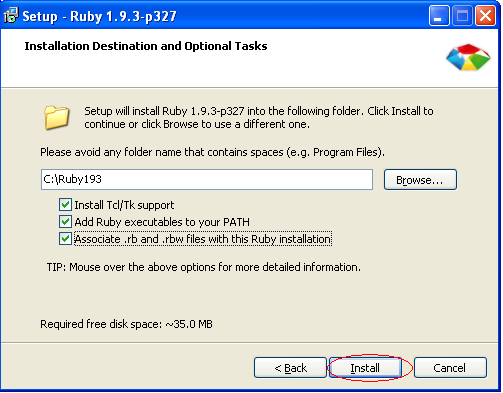
After clicking on install it will install all the required packages automatically in the directory chosen.
When the installation is complete the below window is shown and then click on finish.

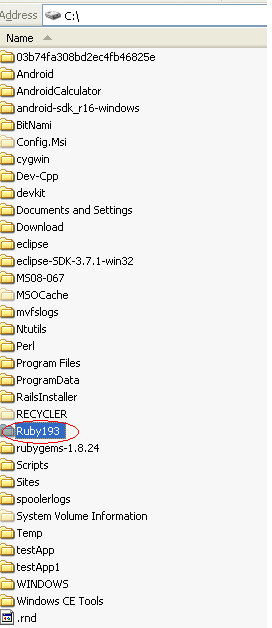
If the installation is success you can see that the folder is created in the directory name you had mentioned during the installation
Installation of Ruby Gems
Download and install RubyGems. Ruby gems can be downloaded from the compass site provided in the repository section (rubygems-1.8.24.zip). It is a zip file extract it and then put it in the directory of your choice. I prefer C:\
To install the gems you need to install it through the command line. So open a terminal window and go to the directory where you had copied the gems folder and then go to its bin folder and use the following command.
C:\rubygems-1.8.24\bin>gem install –http-proxy http://wwwgate0.mot.com:1080 rails –include-dependencies
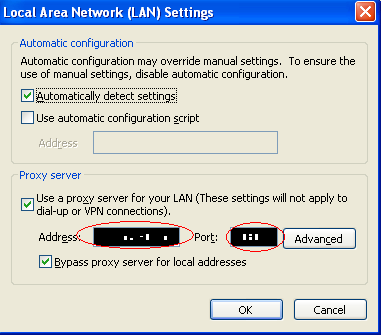
If you are using proxy then use the –http-proxy option and then the proxy details as http://username:password@example.com: 8080 To know the proxy details check the browser. For IE go to Tools – Internet Options – Connections – Lan Settings
When you use the above command then please wait for some time till the installation completes.It will take some time.
Installation of development kit
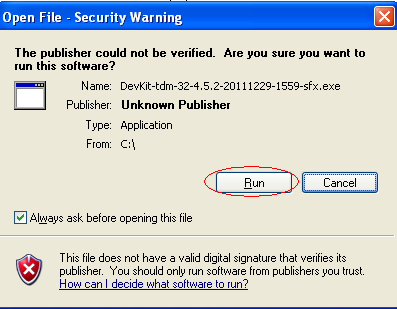
Now install the development kit. The development kit DevKit-tdm-32-4.5.2-20111229-1559-sfx.exe can be downloaded from the compass. Please check the repository section but to install the development kit you need the 7Z player. According to the architecture of your machine whether it is 32 bit or 64 bit download the required player from the compass (please check the repository section.) and install the 7Z software by clicking the exe. After this click the dev kit and this will get extracted to the directory you wish to extract. After clicking the exe click on Run.
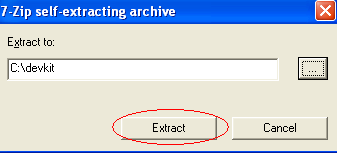
It will ask for where the files to be extracted. I chose C:\ devkit and click on Extract.
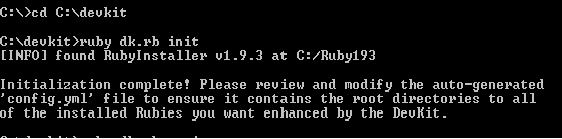
After the extraction is successful , open a terminal window and go to the folder where the devkit was extracted. IN my case it is C:\devkit so I will use the command cd c:\devkit in the terminal window and then use the command ruby dk.rb init to generate the config.yml file to be used later in this Step. Your installed Rubies will be listed there (only those installed by a RubyInstaller package are detected at present).
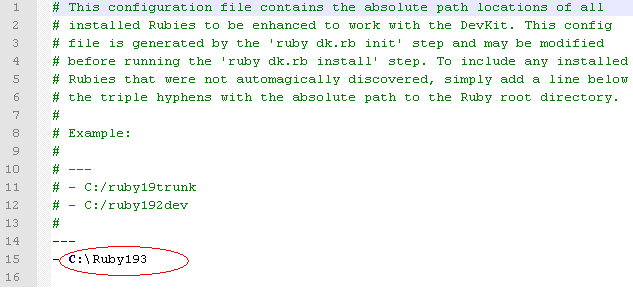
Edit the generated config.yml file to include installed Rubies not automagically discovered or remove Rubies you do not want to use the DevKit with.

Since my gems are present in C:\Ruby193 folder so I need not edit the config.yml file. Else you need to edit it to the correct folder where your rubies are installed. Most of the time the command will automatically detect the correct location else you need to edit it.
to review the list of Rubies to be enhanced to use the DevKit and verify the changes you made to it are correct use the command ruby dk.rb review

Finally, ruby dk.rb install to DevKit enhance your installed Rubies. This step installs (or updates) an operating_system.rb file into the relevant directory needed to implement a RubyGems pre_install hook and a devkit.rb helper library file into <RUBY_INSTALL_DIR>\lib\ruby\site_ruby. NOTE: you may need to use the --force option to update (with backup of the originals)

To check the installation by running gem install rdiscount –platform=ruby.
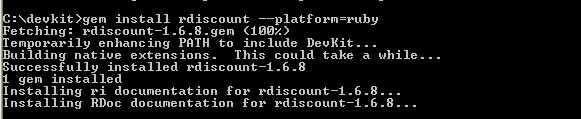
RDiscount should install correctly and you should see with native extensions in the screen messages. Next runruby -rubygems -e “require ‘rdiscount’; puts RDiscount.new(‘**Hello RubyInstaller**’).to_html” to confirm that the rdiscount gem is working.
![]()
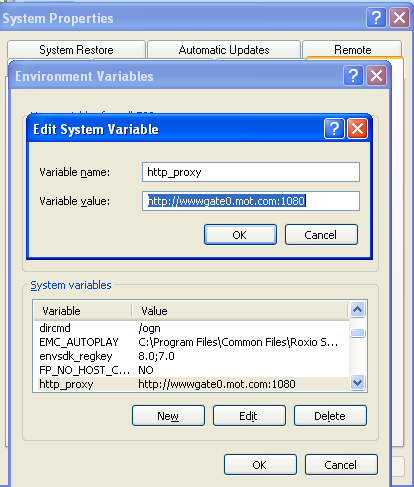
Setting up the proxy in the environment variable
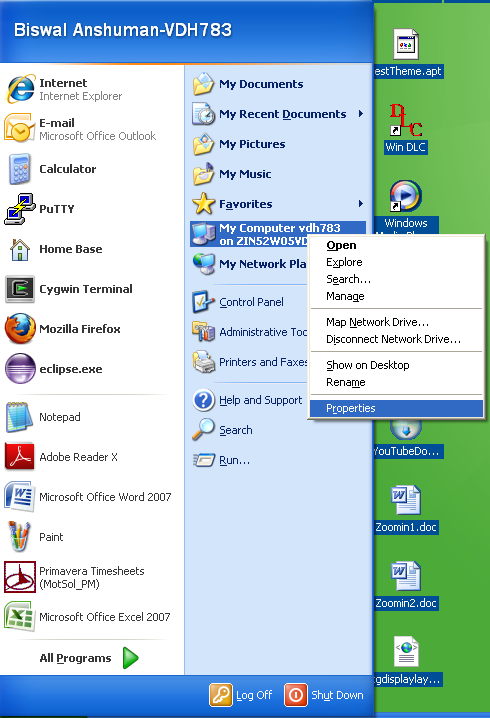
Now we are ready to create a grails project .But if you are using a proxy then you need to set the proxy in the enviorment variable.Go to start- right click ion my computer and click on properties
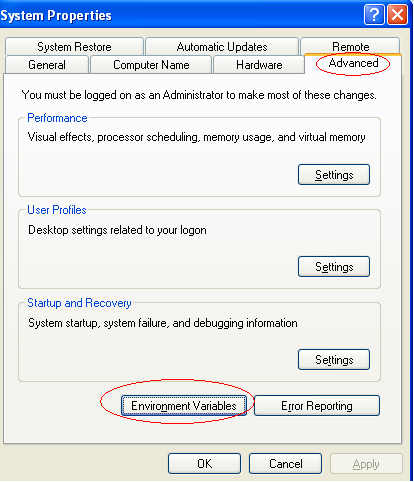
This will open up the system properties windows and then go to Advanced tab and click on Enviornment Variables
Click on new in the System variable and enter http_proxy in the Variable name and value in thr form http://username:password@example.com: 8080 and click on Ok and now the http_proxy is set in the environment variable.
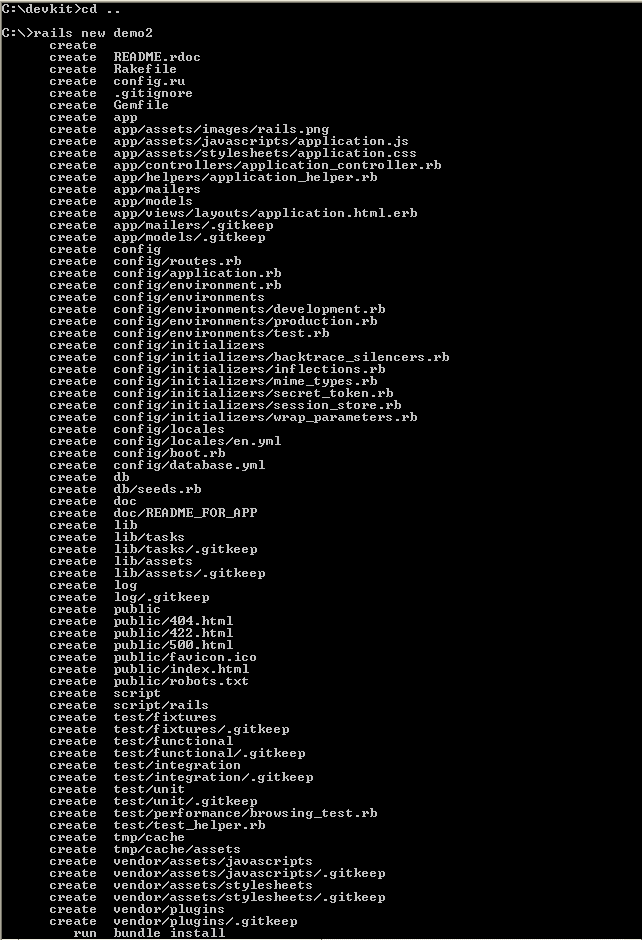
Creation of new Rails project
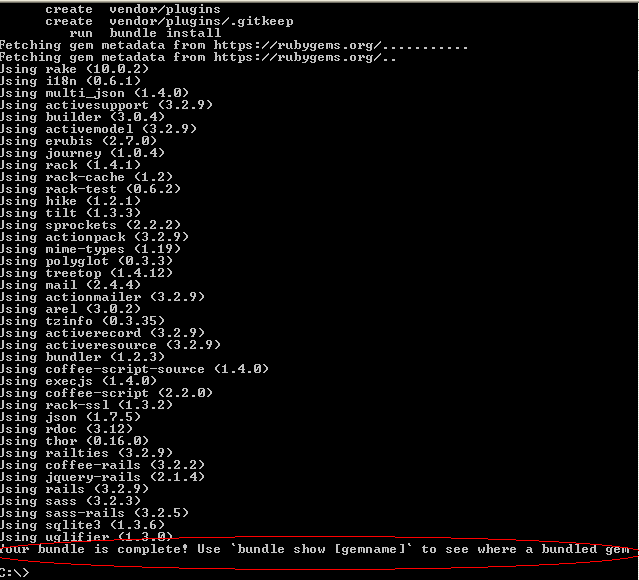
With all these installation we are ready to start ROR project. To check open up a terminal window and use the command rails new <name of the project> . I used rails new demo2. And if the project creation is successful then the terminal window will look as follows
Now cd to the project directory created. In my case it is demo2 so I used cd demo2. And then run the command rails s , to start the server. It will take a bit of time to start the server. When the server starts successfully the terminal window will look something like this.
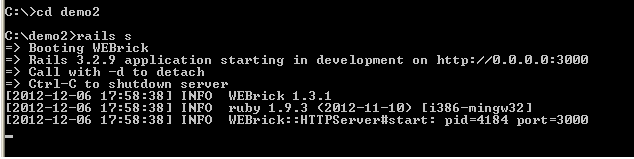
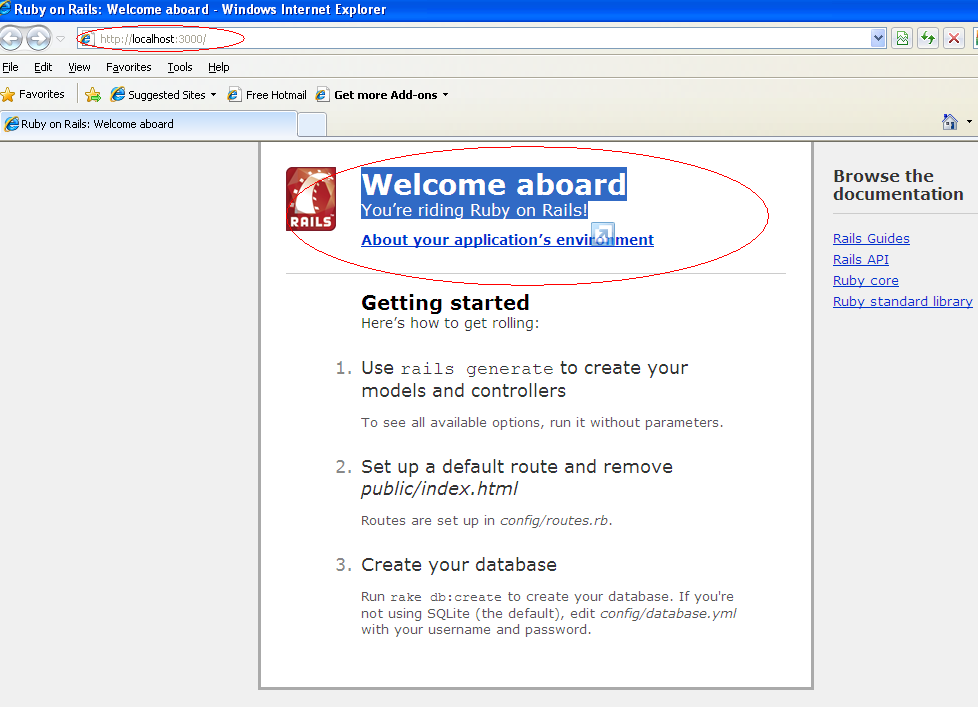
Now open up a browser and use http://localhost:3000 in the address bar and you should see Welcome aboard You’re riding Ruby on Rails!
Repository Information
Rubyinstaller-1.9.3-p327.exe: https://docs.google.com/file/d/0Bw8PxLPfO_aKczZVa2Z3ZmllN1E/edit?usp=sharing
Rubygems-1.8.24.zip: https://docs.google.com/file/d/0Bw8PxLPfO_aKUWpqODRuaE15R2c/edit?usp=sharing
DevKit-tdm-32-4.5.2-20111229-1559-sfx.exe: https://docs.google.com/file/d/0Bw8PxLPfO_aKUFpzVEZ5LWRkaEU/edit?usp=sharing
7z920-x64.msi: https://docs.google.com/file/d/0Bw8PxLPfO_aKZmxqeDFIQTVVMlk/edit?usp=sharing
7z920.exe: https://docs.google.com/file/d/0Bw8PxLPfO_aKUTgxZEpfeXE0bzQ/edit?usp=sharing
